![]()
前回は簡易的というかダウンロードしたファイルをそのまま取り込むという方法でWindows11にLINUXを入れてみました。
今回はWindows11に完全版のLinuxを入れる方法を書きたいと思います。前回よりダウンロードするファイルも容量が大きいのでダウンロードに時間がかかったり、LINUXもインストーラーからインストールしますので時間がかかります。簡易版と完全版のLINUXを見比べてみたのですがどこが違うのかわかりませんが、おそらく完全版のほうが細かい設定やいろいろとできることがありそうです。
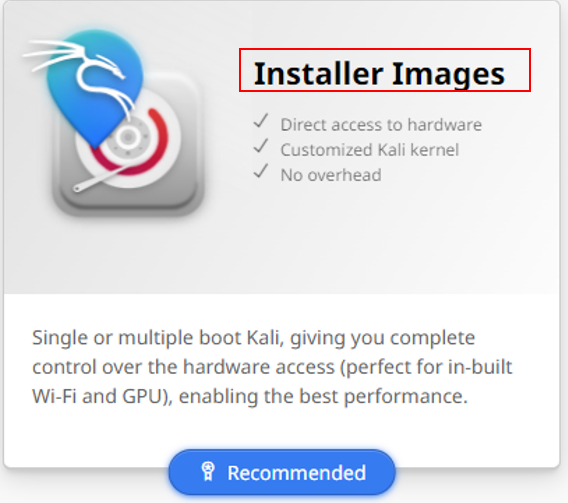
https://www.kali.org/get-kali/#kali-installer-imagesより「Installer Images」をクリック
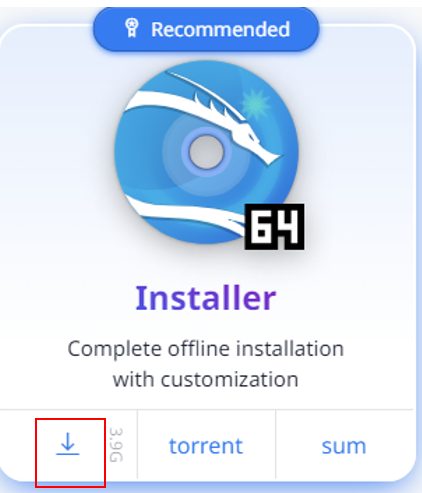
「ダウンロード」ボタンをクリック
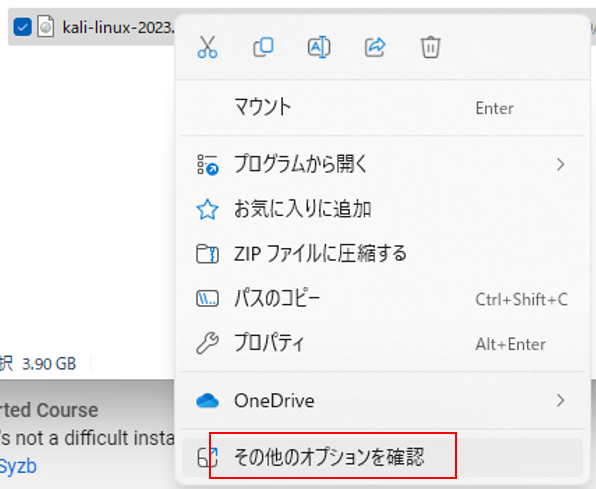
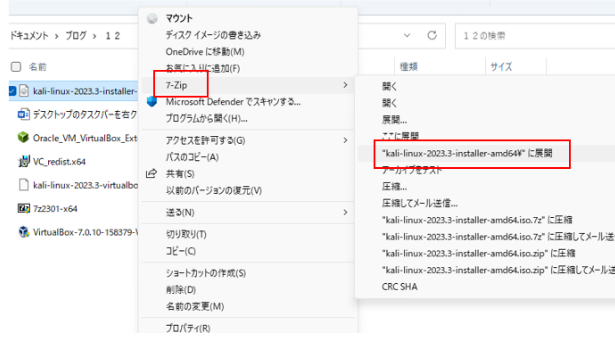
ダウンロードしたファイルを右クリックして「その他のオプションを確認」をクリック
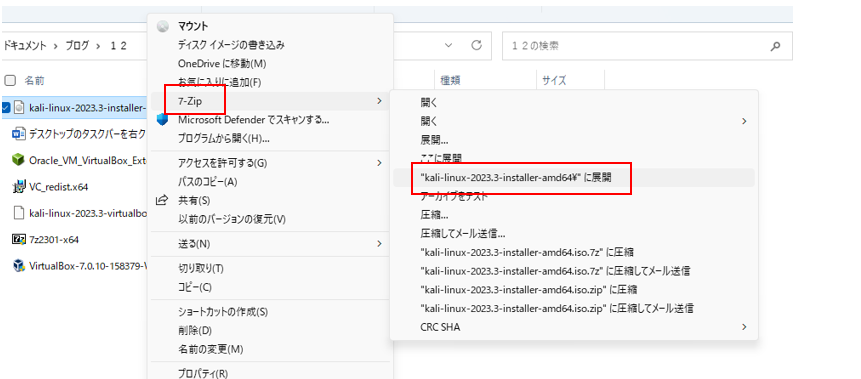
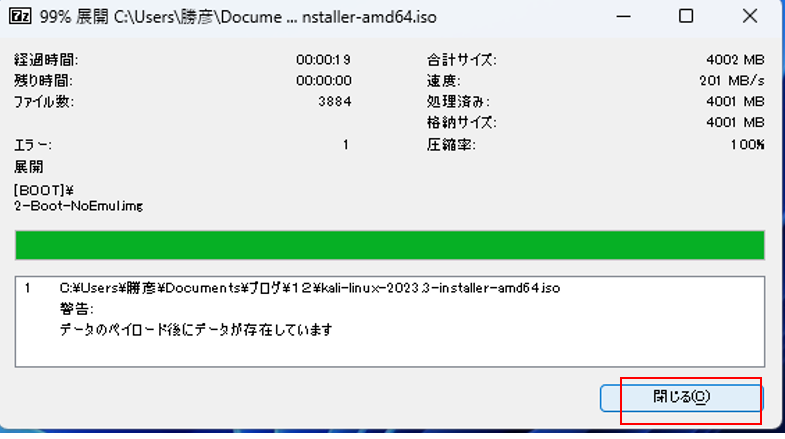
「7-zip」→「kali ~ に展開をクリック
展開が完了したら「閉じる」をクリック
「7-zip」→「kali ~ に展開をクリック
x
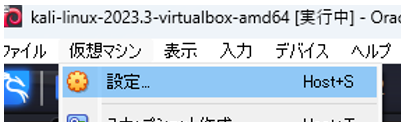
「仮想マシン」→「設定」をクリック
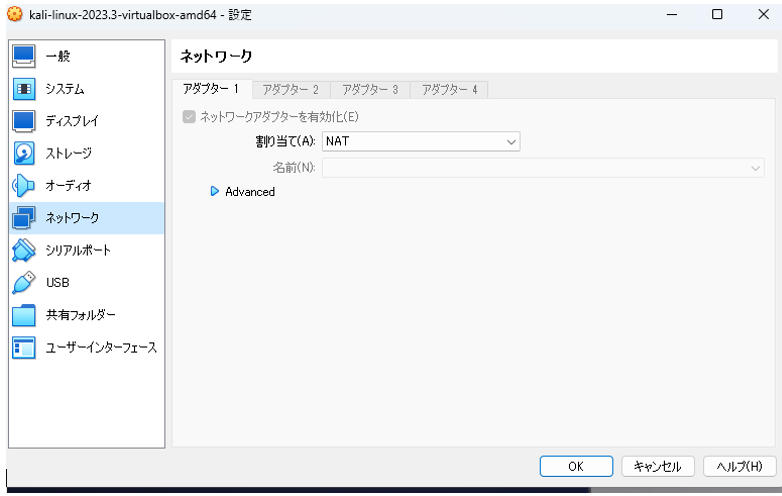
「ネットワーク」→割り当てが「NAT」になっているか確認
コマンド画面を出す
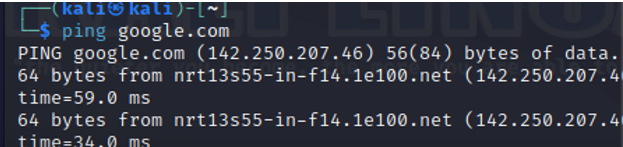
「ping google.com」と入力してレスポンスが返ってくることを確認
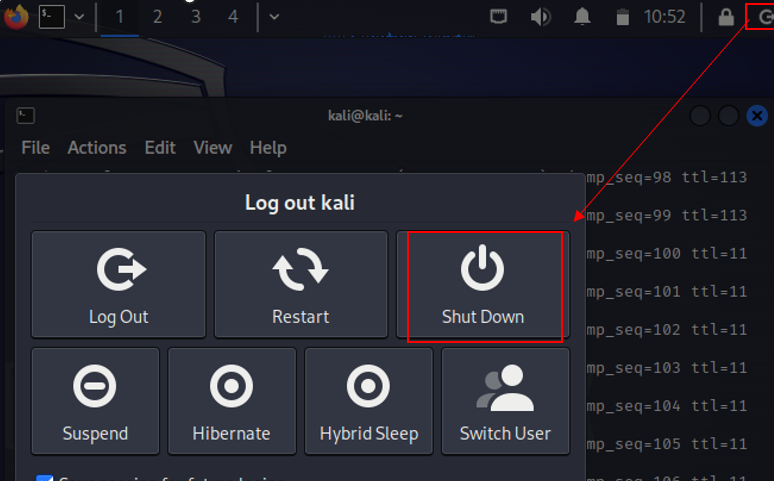
シャットダウンする
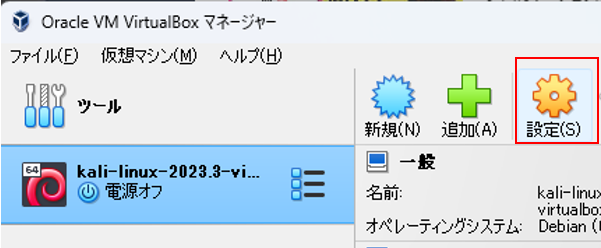
「Oracle VM VirtualBox」を起動して、「設定」をクリック
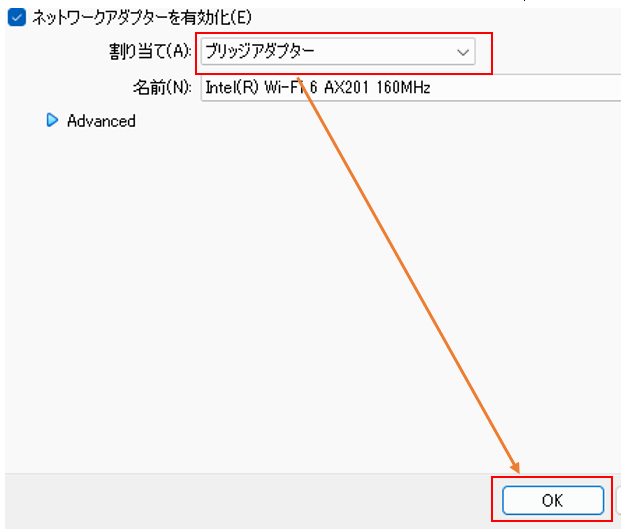
「割り当て」を「ブリッジアダプター」へ変更して「OK」
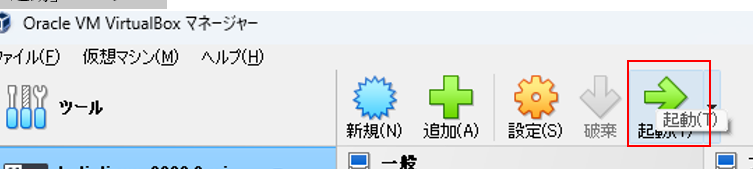
「起動」をクリック
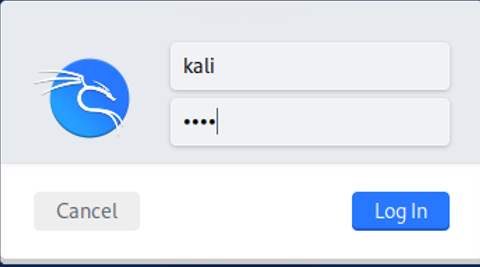
上段:kali 下段:kaliと入力して「Login」するとkali linuxへログイン
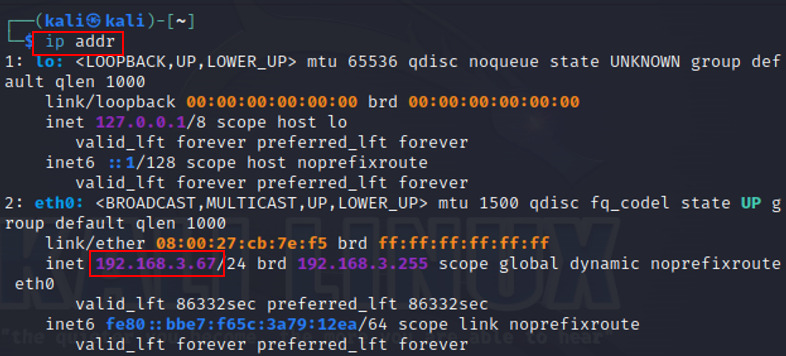
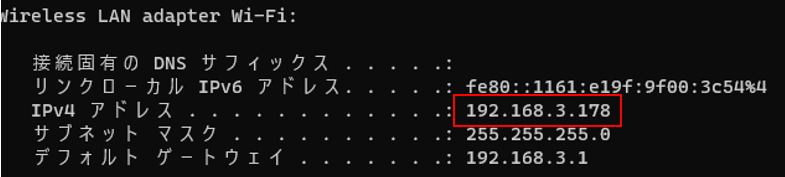
コマンド画面を起動して「ip addr」と入力して「IPアドレス」を確認
ホスト側のPCでコマンドプロンプトを起動

「IPCONFIG」でホストPCのIPアドレスを確認
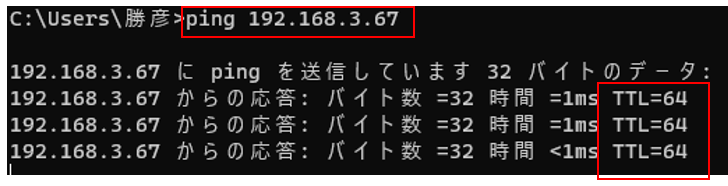
「ping」で仮想マシンのIPアドレスを入力して疎通確認
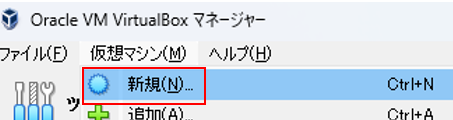
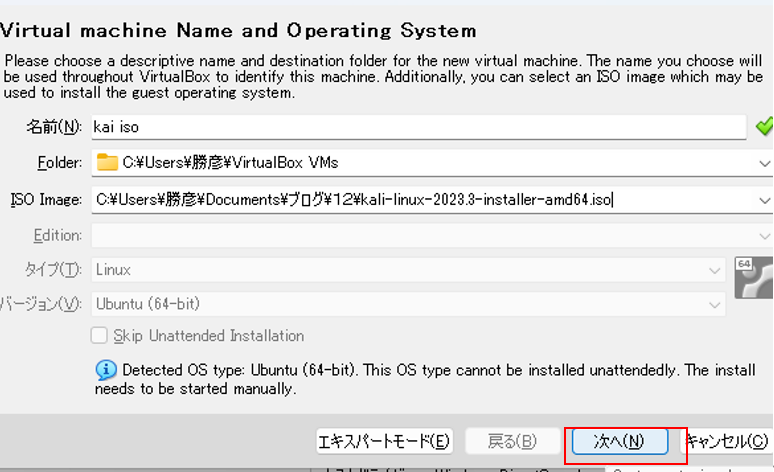
「仮想マシン」→「新規」を選択
「ISO Image」より「その他」を選択
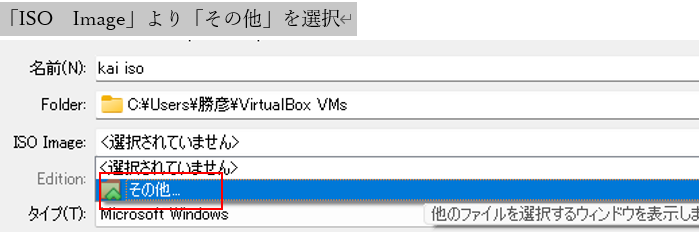
以前、ダウンロードした下記のイメージファイルを選択
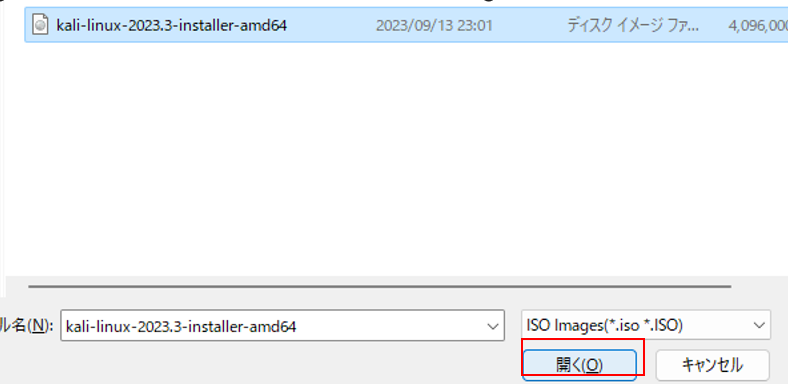
「次へ」を選択
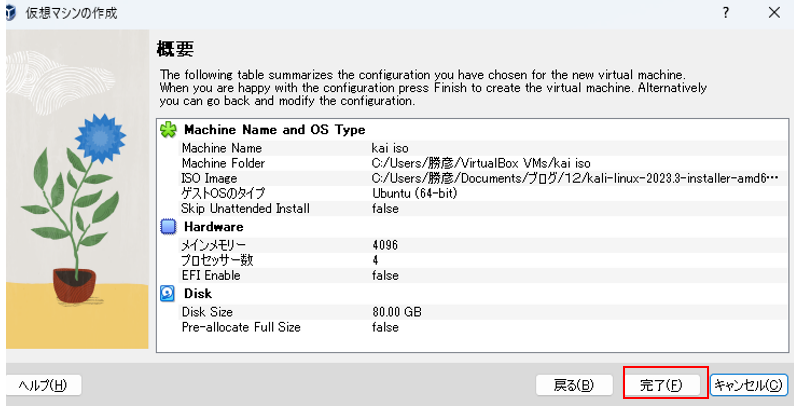
「メインメモリ」を「4096」へ調整して「次へ」を選択
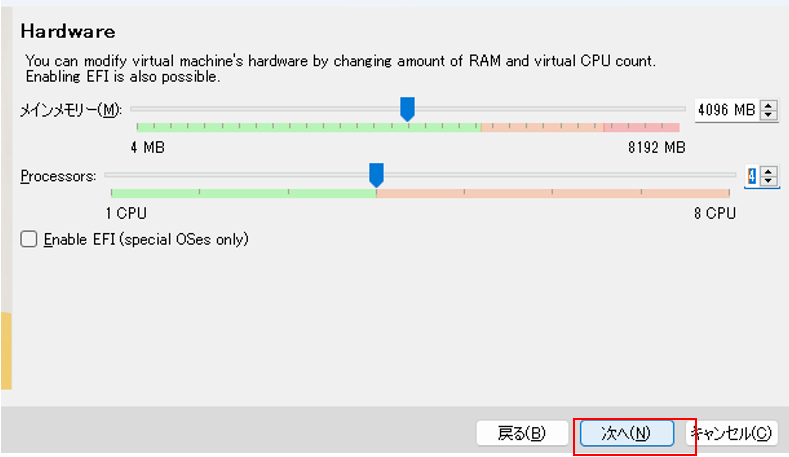
「Disk Size」を「80GB」にして「次へ」を選択

「完了」を選択
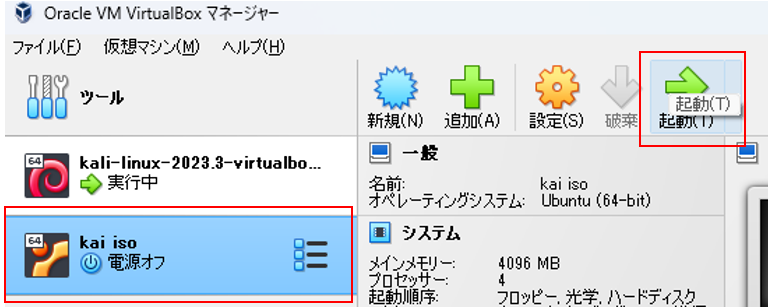
該当の仮想マシンを選択して「起動」を選択
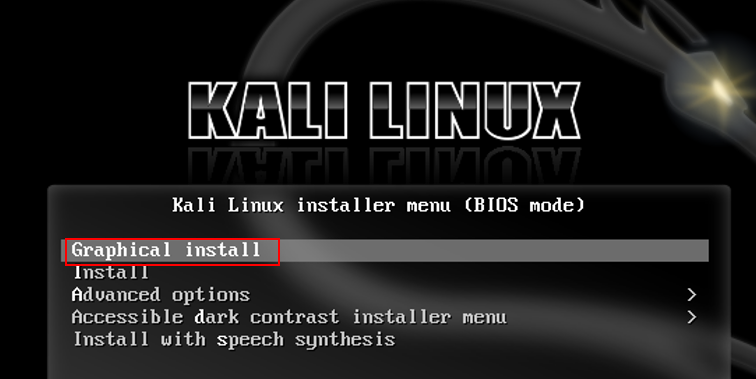
「Graphical install」を選択してエンター
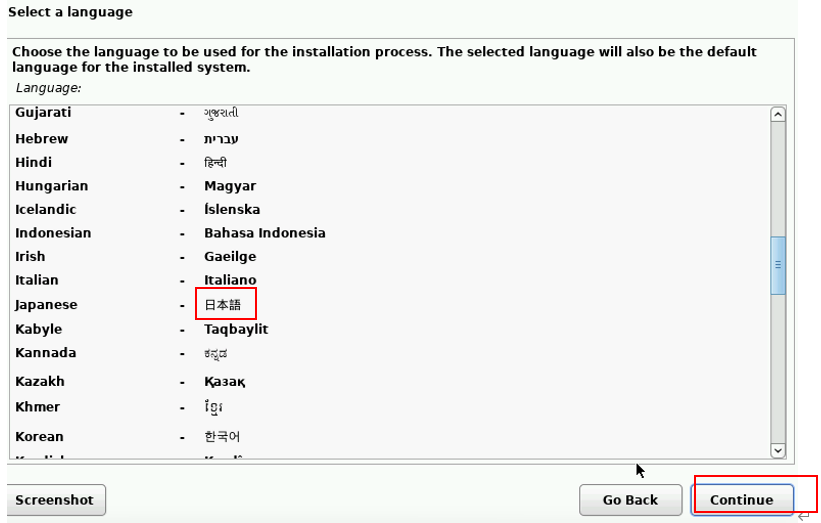
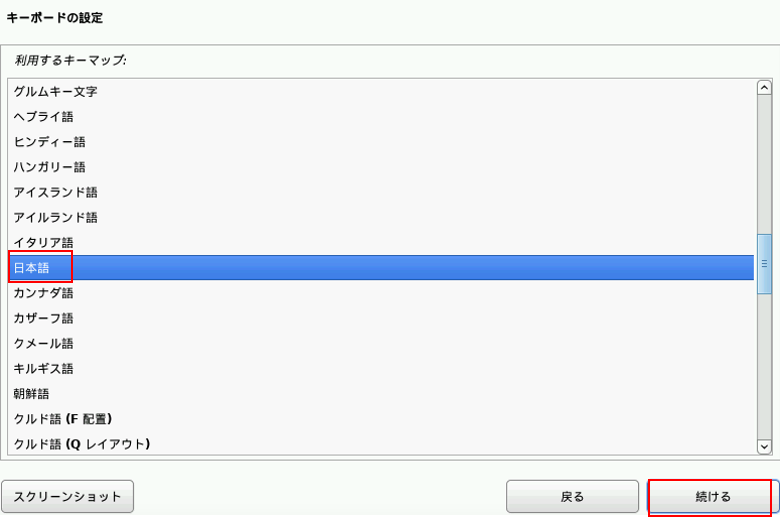
「日本語」を選択して「Continue」を選択
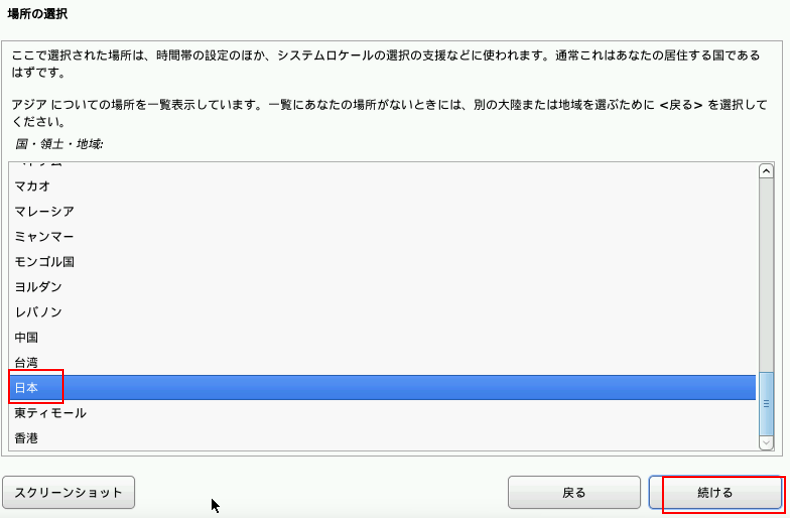
「日本」を選択して「続ける」を押下
「日本語」を選択して「続ける」を選択
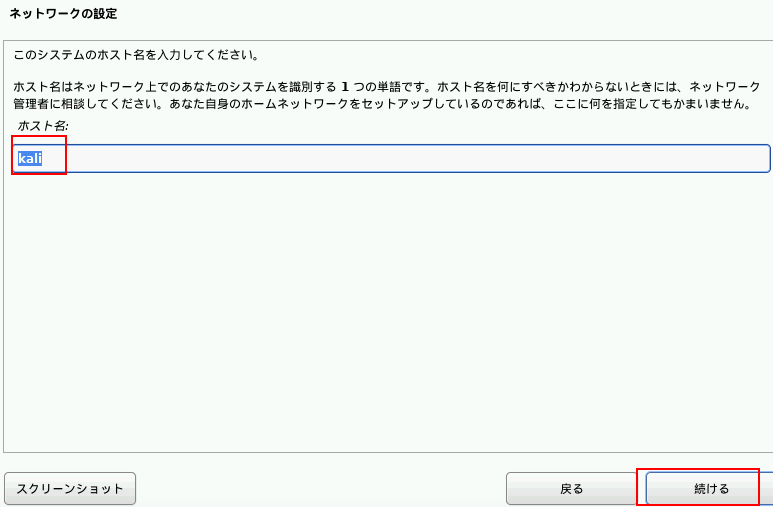
ホスト名に「kali」を入力して「続ける」を選択
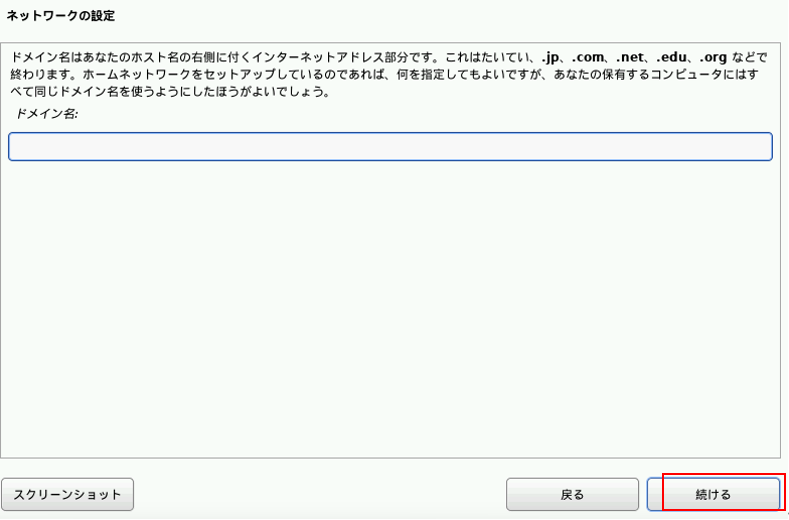
「続ける」を選択
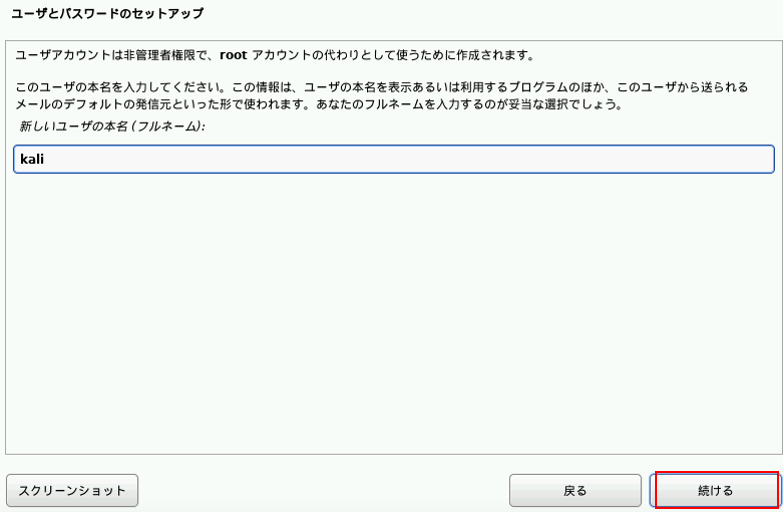
新しいユーザー名の本名を「kali」を入力して「続ける」を選択
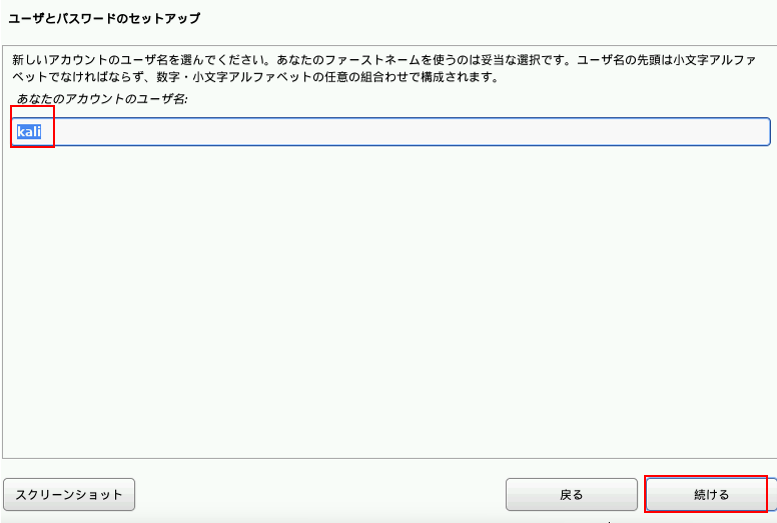
あなたのアカウントのユーザー名を「kali」を入力して「続ける」を選択
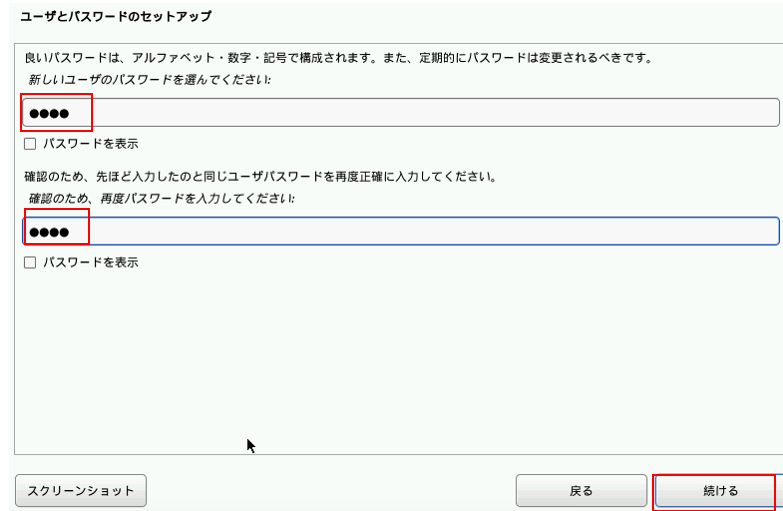
パスワードを入力して「続ける」を選択
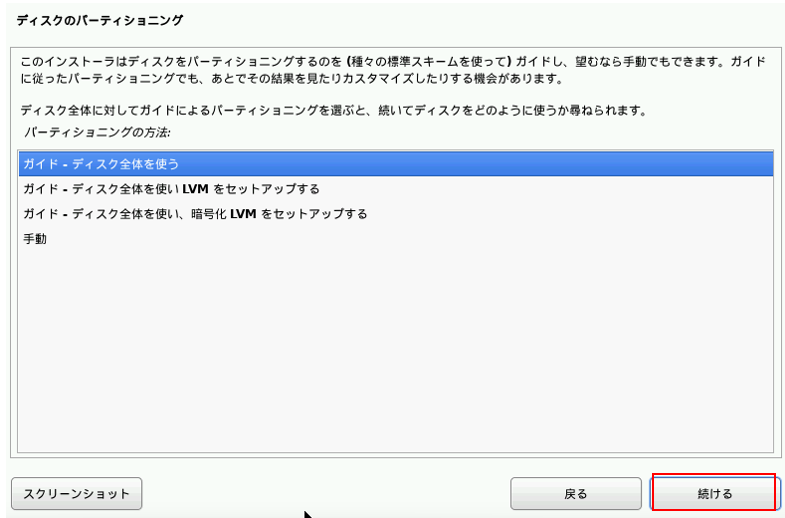
「ガイド-ディスク全体を使う」を選択して「続ける」を選択
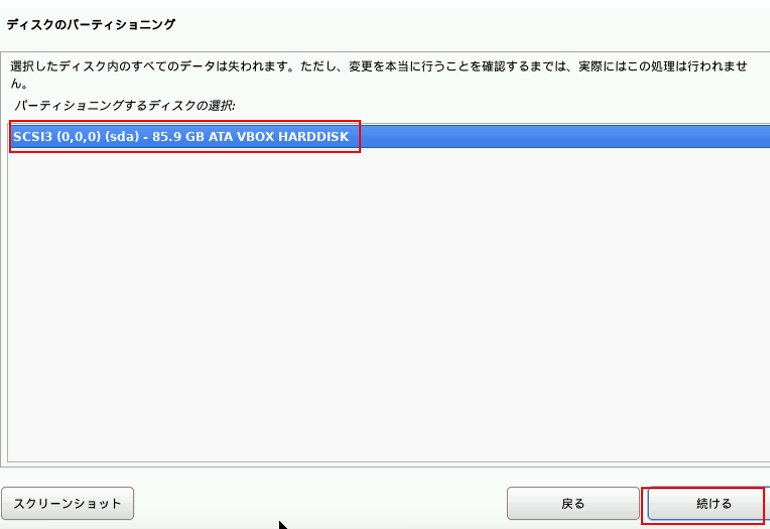
ディスクを選択して「続ける」を選択
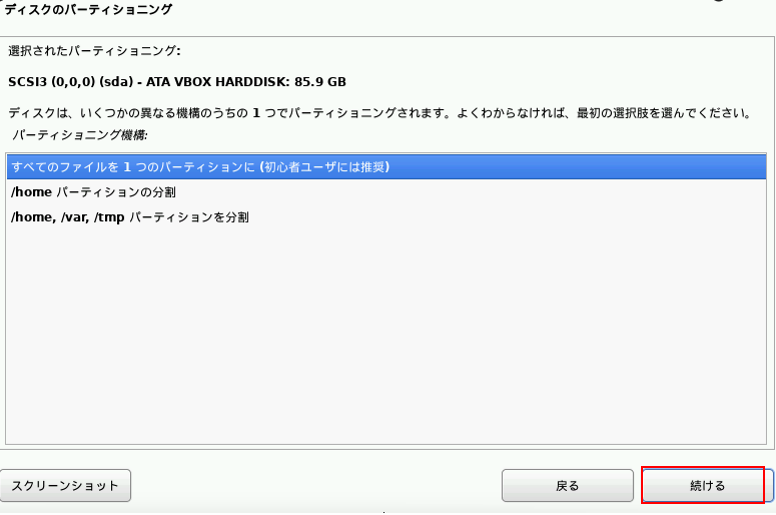
「すべてのファイルを1つのパーティションに~」を選択して「続ける」を選択
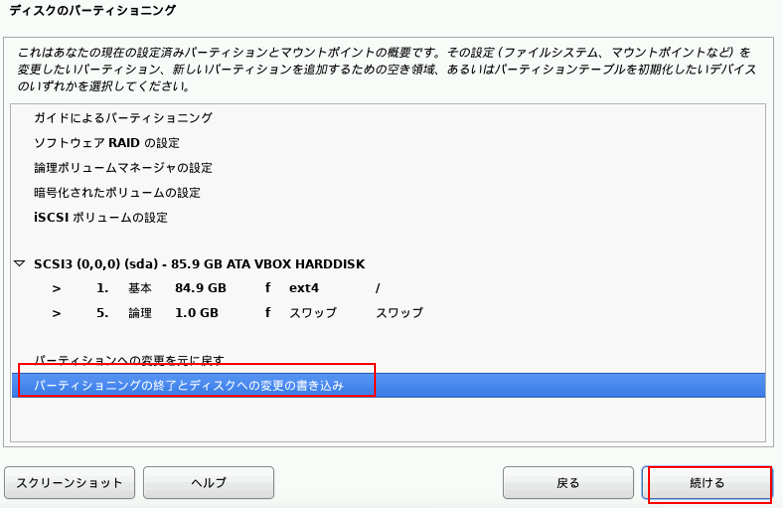
「パーティショニングの終了とディスクへの変更の書き込み」を選択して「続ける」を選択
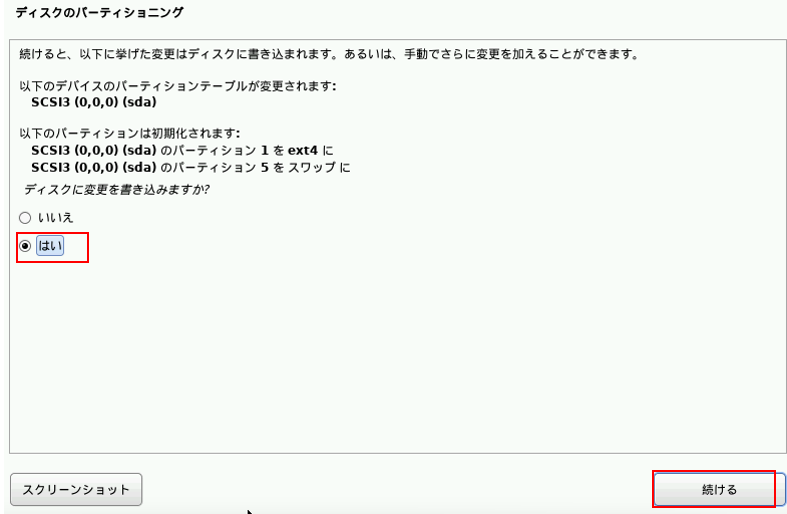
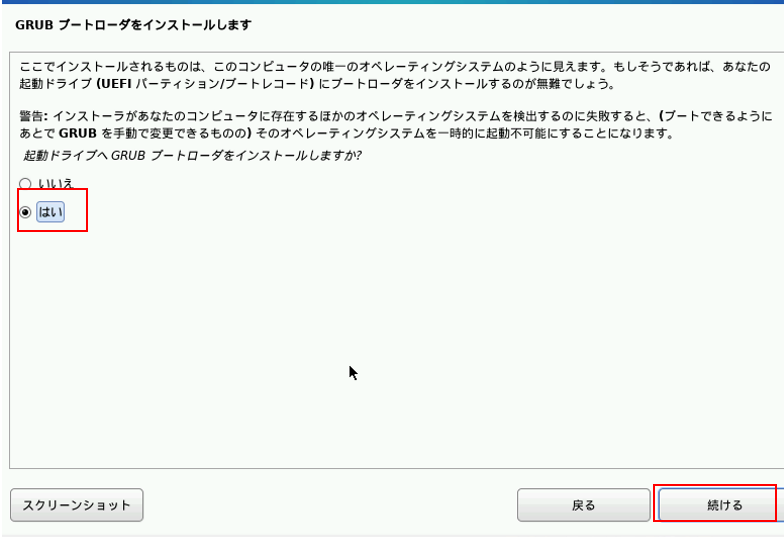
「はい」を選択して「続ける」を選択
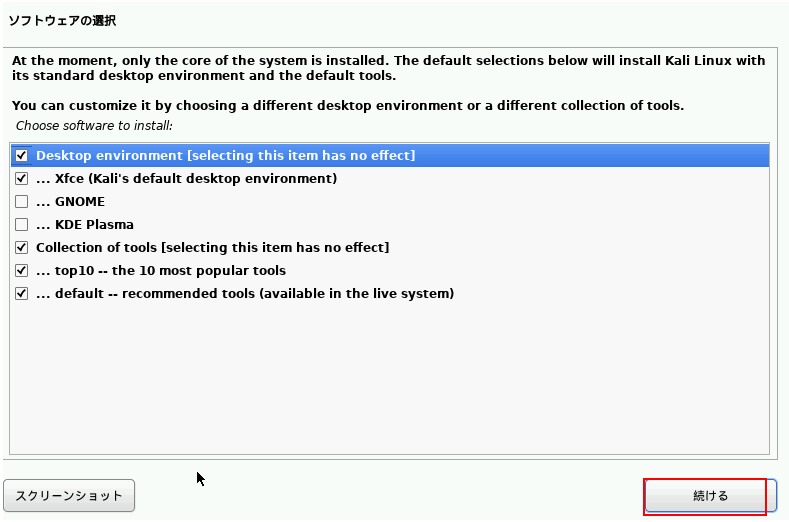
そのまま「続ける」を選択
「はい」を選択して「続ける」を選択
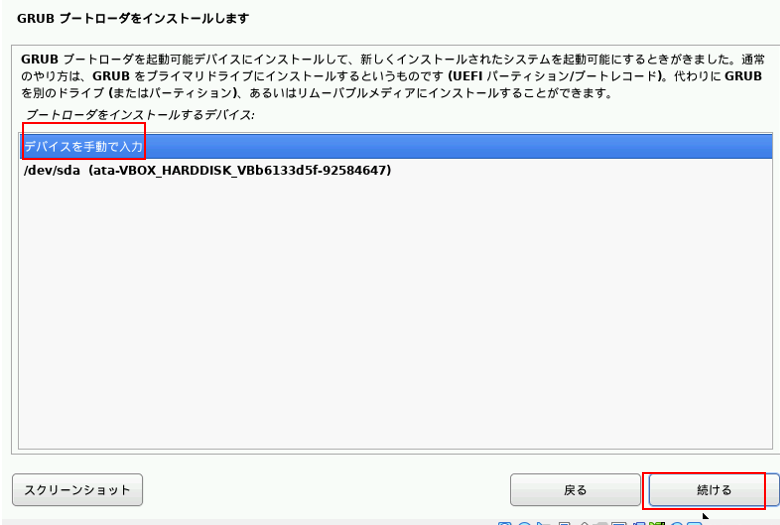
「デバイスを手動で入力」を選択して、「続ける」を選択
「続ける」を選択
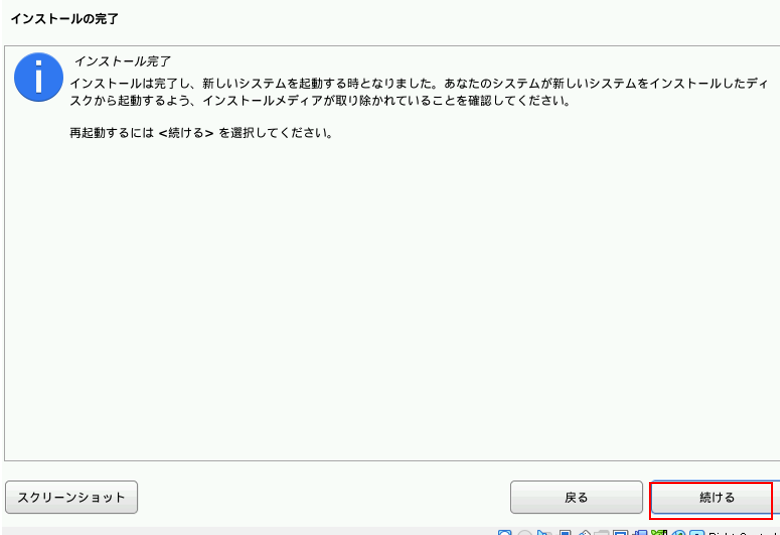
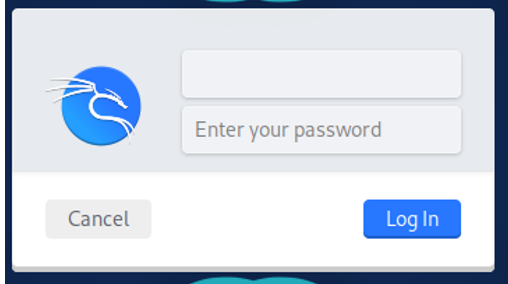
Kaliのログイン画面が表示されますのでログイン可能です。
まとめ
今回は長めの内容でしたがインストーラーからLinuxを入れる方法をやってみました。前回USBメモリからLINUXを起動させるために同じようなことをやりましたが今回は無事に起動からログインまでできました。簡易版と完全版LINUXを起動させて違いを確認しようとしたのですが入っているアプリは同じに見えました。ただ、インストーラーから入れた完全版LINUXのほうが安定はするのではないかと思います。